Pages
▼
Wednesday, November 26, 2014
Disney's Frozen Meets Cricut's Design Space
The biggest news to hit the Cricut world since the Explore was released has just been announced! Cricut has a brand new image set based on the Disney movie Frozen! These images have been released in Design Space, the powerful software that runs the Cricut Explore. While they are currently exclusive to Design Space, they will be released in 2015 as a physical cartridge and added to Cricut Craft Room! Through Design Space, you can buy the cart or you can buy single images. There are 111 images and you can see them all in Design Space! Just search Frozen.
If you don't have an Explore yet, now is the perfect time to buy one since there are so many great deals for Black Friday!
Come join us over in Cricut Lovers Guide to Design Space for all the latest info!
Friday, November 21, 2014
Free File Friday ~ 2 K-Cup Box
It's Free File Friday over in my facebook group, Cricut Lovers Guide to Design Space! And today's free file is a cute little box that will hold 2 K-Cups. This would be a perfect little gift for co-workers or added to a gift basket for an extra special gift.
The box file was designed in Cricut Design Space using shapes from the free image set, Craft Room Basics. That means any Design Space user can cut this file! The cute little turkey is from Omar Toro's awesomesvgs.blogspot.com and he shares it for free! He designed the little turkey as an adorable place card holder for your Thanksgiving table. But I used the Print then Cut feature on the Explore and added it to the box front.
To get the box file, go join Cricut Lovers Guide to Design Space group! It's free to all the members! There are lots of free files, project sharing, inspiration, tips, tricks and troubleshooting for your Explore and Design Space.
Assembly Instructions:
The file will cut and score. Just fold along the score lines and use a bone folder to make them crisp. Use a little caution when folding along the edge of the circles. I placed the box on my desk and used the edge of the desk to start those folds. Your box should look like this:
Now lay your box, with the inside on your work table and apply your adhesive to the long edge {on the right and marked in black in the next photo} and the two outer flaps on each side {marked in black}. Turn the box over and carefully add adhesive to the center flap on each side {marked in red in the photo}. I embossed the box in the photo using an Anna Griffin embossing folder.
{For less "bulk" when assembled, I used my scissors and snipped the flaps along the long edge. I will adjust the file and remove those sections if I can save and reopen after using the Slice feature.}
Then, push the center flap out of the way and line up and adhere the other two flaps on one side. Your box should look like this:
Then repeat on the other side.
Now fold the remaining flaps up and adhere them to the sides.
Now push the remaining flaps inward and fold the box down onto the back. Reach into the holes and make sure the edges are firmly adhered.
That's it. . .except for the embellishments! For this box, I used the Print then Cut feature with my Explore and the gorgeous Anna Griffin Vintage Floral printables. And they were perfect!
Saturday, November 8, 2014
All Aboard the Peppermint Express!
Elf added!
The Santa Train card gave me so many ideas for the Stacked Blocks card base! Here's the Peppermint Express! Only, he doesn't have a conductor. I just couldn't decide what image to put in the window so I attached it with temporary adhesive and will stare at it a while! What/who do you think should be "in" the window? I thought about the Candy Boy from the My Community cart but wasn't thrilled with that idea.
So the elf got an overwhelming recommendation on Facebook, so I added my favorite one from the Jolly Holidays cart!
The Stacked Blocks card base was designed in Cricut Design Space using images from Craft Room Basics. The file is free to members of my Facebook group, Cricut Lovers Guide to Design Space. The candies an bow are from Cricut carts as well.
Come join me on Facebook! And tell me here or there just who should be driving the Peppermint Express!
Friday, November 7, 2014
Santa Train Card from the Stacked Blocks Card Base!
Hop aboard Santa's Train! This is made from the Stacked Blocks card base and I cut it in dark green. I used the wheels from the train on the B is for Boy cart. The wreath is from the Christmas cart. Santa is from A Quilted Christmas and I made him into a Print then Cut. I also used the slice feature in Design Space to remove the lower half of his body{!}. Other shapes came from Craft Room Basics.
The two patterned papers, the red is a polka dot print and the green is a snowflake print, came from my favorite paper designer, Anna Griffin.
I gained inspiration from a Valentine Train card by Chris that I came across while trying to determine the "official" name of this type card. If you want the base file for the stacked blocks card, it's the Free File Friday over in my facebook group, Cricut Lovers Guide to Design Space! Come join!
Free File Friday ~ Stacked Blocks Card Base!
It's Free File Friday in Cricut Lovers Guide to Design Space on Facebook! Today's free file is the stacked blocks card base! Some have called it a Stair Step card but there are so many "step" card types and this one resembles stacked blocks, so that's what I'm calling it. It's a great card that folds flat to mail and then stands as a decoration!
The card base:
The base cuts in two pieces because the Explore can only cut 11.5 inches on the standard 12 x 12 mat. You could always use the longer 12 x 24 mat or make the design slightly smaller. This is what the two pieces will look like once you have cut and scored them.
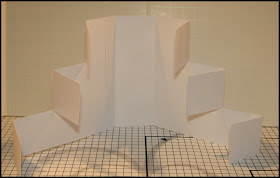
When you stand them up, you can see how they will go together. This is a good time to make sure you have your design {if you are using a patterned paper for the base} the way you want it to be facing.
Now, decide which way you want your card to face. Since you will be gluing the tops flaps of each "block", determining the direction you want your card to face will allow you to have a more finished look on the edges by gluing the flap that folds toward the back on top of the other flap.
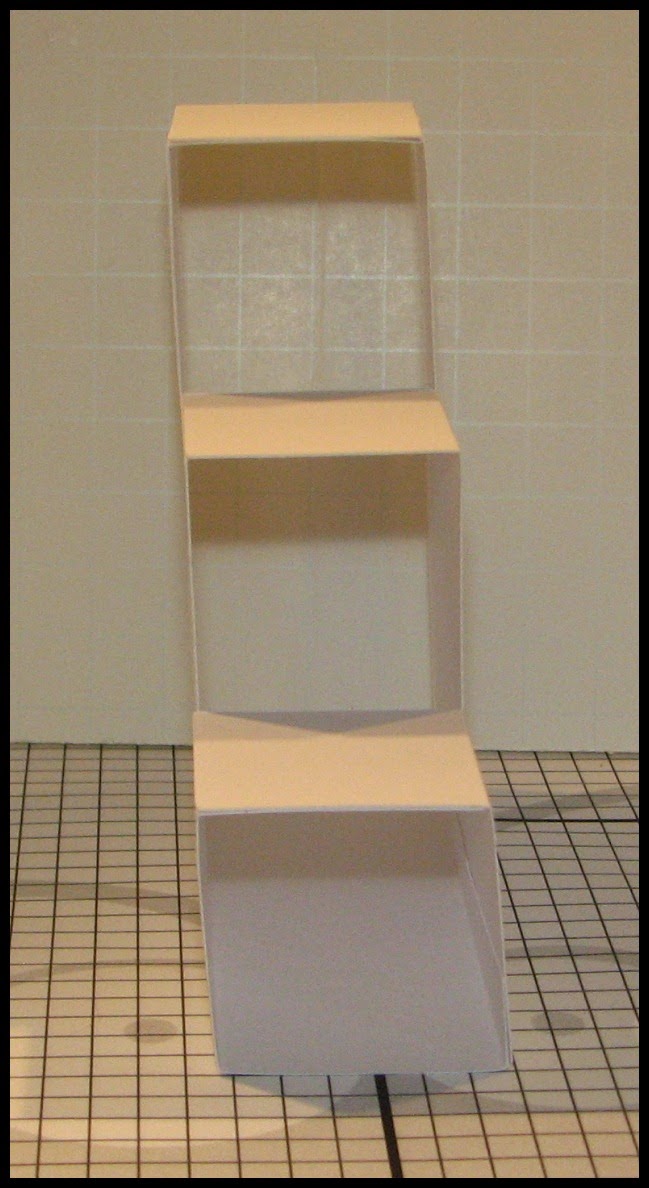
This is what the card will look like from the side.
And this is how the card "flattens" to fit inside your envelope.
The file also includes the squares to embellish the sides. This FREE file is available in the Cricut Lovers Guide to Design Space group on Facebook. Come join us and get this file as well as many others and lots of tips and tricks and inspiration!
The card base:
The base cuts in two pieces because the Explore can only cut 11.5 inches on the standard 12 x 12 mat. You could always use the longer 12 x 24 mat or make the design slightly smaller. This is what the two pieces will look like once you have cut and scored them.
When you stand them up, you can see how they will go together. This is a good time to make sure you have your design {if you are using a patterned paper for the base} the way you want it to be facing.
Start by gluing the thin edge of the piece on the left to the inside of the piece on the right. This will make your "seam" hidden inside the card. Your card base should look like this. {If you click on the photo, it will enlarge and then you can easily see the "seam" on the left.}
Now, decide which way you want your card to face. Since you will be gluing the tops flaps of each "block", determining the direction you want your card to face will allow you to have a more finished look on the edges by gluing the flap that folds toward the back on top of the other flap.
This is what the card will look like from the side.
And this is how the card "flattens" to fit inside your envelope.
The file also includes the squares to embellish the sides. This FREE file is available in the Cricut Lovers Guide to Design Space group on Facebook. Come join us and get this file as well as many others and lots of tips and tricks and inspiration!


.JPG)


