Showing posts with label treat. Show all posts
Saturday, January 25, 2014
Warm Winter Wishes
Over at the Fantabulous Cricut Challenge Blog, the challenge theme this week is Snowmen. So I decided to make this little bag topper for packets of hot chocolate for the school staff and volunteers than man the carpool line at the elementary school. Each bag has 2 packets of hot chocolate mix since the same staff man morning and afternoon carpool.
The word "winter" with the snowman attached is from the Stretch Your Imagination cart. The words "warm" and "wishes" are from Don Juan. And the shape for the topper is from the free Craft Room Basics image set.
Hope this help warm them up after carpool duty! And sure hope the temperatures warm up around here!
Thursday, March 28, 2013
Bunny Lollipop Holders
I made these cute little bunny Lollipop Holders using the rabbit from Animal Kingdom and an oval {to fill in where I welded the two rabbits together} from Craft Room Basics. The eyes are a small hole punch, the nose was a free hand cut and the mouth was hand drawn. Fold at the bottom of each rabbit, place a Tootsie Roll Pop inside and tie a ribbon around the neck!
Sunday, March 17, 2013
Happy St. Patrick's Day!
Today's projects are a cute Leprechaun Teddy Bear {this was made by someone else and given to me}, from the Teddy Bear Parade cart and a Pot 'O Gold {that I made}, using the Sweet Tooth Boxes cart.
I used the Ice Cream cut from Sweet Tooth Boxes and welded a rectangle from CCR to the top to cover the scallops. I added feet to the pot {which you can't see from this angle} by rolling four quarter inch strips of black card stock and gluing them to the bottom. Add the Rolo candies and it's a pot 'o gold!
Hope you wore some green today and didn't get pinched! Thanks for stopping by!
Thursday, February 14, 2013
Bear Hugs Treat Box
Happy Valentine's Day!
I decided to use the same box base as the Hogs and Kisses Pig and turn it into a little bear! Only a few simple changes for the face and viola! It was a bear! And, it really should be filled with Hershey's Hugs candies {to go with the Bear Hugs name}, but by the time I was ready to take the photo, someone in my family had eaten all the Hugs!
I can't wait to use this little box for an upcoming baby shower! I'll just have to be sure to hide the candy!
Wonder what I should turn the box into next?
Saturday, February 9, 2013
Hogs and Kisses
A super cute little treat holder for Valentines Day! I saw this idea on Joy's Blog and knew right away I wanted to make it with my Cricut. I used the box from the Wrap It Up cart for the base, leaves from the Disney Classic cart for the ears and circles and ovals from Craft Room Basics for the snout, nostrils and eyes. Add a few Hershey kisses, a sweet little bow and you've got. . .Hogs and Kisses!
Wednesday, December 12, 2012
Snowman Treat Holder
Here's a couple of Snowman Treat Holders I made using Tie the Knot, Doodlecharms and CCR. The little one holds 2 Hershey nuggets and the bigger one holds 2 {possibly 3 but I only had 2 on hand} Ghirardelli squares. If you don't cut the flaps off that cross over inside the box, you could put quite a few M&Ms in there instead.
Tuesday, December 11, 2012
Elf Shoe Cookie Wrapper
Here's a quick and easy gift for co-workers or neighbors. It's an elf shoe that wraps around a stack of red filled Oreo cookies! I used the elf shoe from Teddy Bear Parade and a scallop circle from Craft Room Basics and CCR to make the wrapper. Just stack your Oreos in a clear treat bag {somehow the ribbon covering the twist tie when missing before the photo}, wrap the shoe around the stack and glue the sides of the shoe at the toe end. Fold down the flaps and glue the scallop circles onto the tip of the shoe. Viola! An Elf Shoe gift!
Monday, November 26, 2012
Santa's Stash
Take a plain ole container from the Dollar Tree. . .
Add a little white vinyl and you get a cute treat container!
I used Paper Lace for the font and Billionaire for the moustache. Easy peasy! I might tie a ribbon around the top, but I can't decide. What do you think? Ribbon or no ribbon?
Add a little white vinyl and you get a cute treat container!
I used Paper Lace for the font and Billionaire for the moustache. Easy peasy! I might tie a ribbon around the top, but I can't decide. What do you think? Ribbon or no ribbon?
Monday, November 12, 2012
Christmas Candy Purses
Since the Christmas candy was still out from the Candy Dispenser Boxes, I decided to cut a couple of candy purses {previously seen HERE, HERE with tutorial and HERE on my blog} and decorate them for Christmas.
These are really cute and really easy to make and a good way to use up scraps of paper! Thanks for stopping by!
Saturday, November 10, 2012
Candy Dispenser Boxes
Welcome to the Holly Jolly Blog Hop hosted by Kristen at My Fantabulous Life! You should have come to my blog from Darcy's Blog. If you didn't and want to start at the beginning of the hop, go to Kristen's blog. We've got a lot of great Christmas projects for you to enjoy, so let's get to it!
The project I created for the hop is a cute, little paper Candy Dispenser! I designed the box in CCR using Craft Room Basics and George and Basic Shapes. A friend had seen THIS paper candy dispenser and asked me to make one for Halloween. I used the basic cube box and tweaked it a bit and made a Frankenstein box for her. I knew right away I would be making more of these boxes. I used my same CCR file to cut these boxes and decorated them for the holidays!
I hope you enjoyed seeing my project and will visit my blog again! Now, it's time to hop on over to Cindy's Blog and see what she has ready for you!
Wednesday, October 31, 2012
Easy Peasy Bat Candy Bar Wrapper
It really is easy peasy since the Cricut cart Artiste has a bat card on it. I wanted the bat wings to be long enough to cover the candy bar, so I used CCR and welded 3 of the card images together to get the length I needed. After that, score and fold around the candy bar!
I've hand cut these before and used google eyes but since these were for an "older" audience, I went with red, beady eyes. I punched small circles and then topped them with a blob of Dimensional Magic by Mod Podge.
The tag was printed on my home printer and used to hold the wings together. Here's a screenshot from CCR showing how I placed the images to weld them to be long enough to wrap around the Hershey bar.
Happy Halloween!
Friday, October 26, 2012
Halloween Cat Treat Box
A scrappy friend {hi Cathy} made some adorable Halloween cat lollipop covers using the cat from A Frightful Affair and Craft Room Basics. She shared the file with me, but I don't have the A Frightful Affair cart. So I used the cat image I did have and made it into a Halloween Cat Treat Box. I used the cat from Movable Monsters, gem shape from Once Upon A Princess and shapes from Craft Room Basics for the base and sides. I hid the eyes in the cat image for the back of the box so it was solid.
I lined the eyes on the front with a scrap of orange cardstock and tied on an orange bow. It will hold two fun size candy bars.
Although I didn't use the lollipop cover file, I want to thank my scrappy friend for sharing it and for the inspiration! Her file {in black} and my file {in orange}:
Saturday, October 20, 2012
Hanging Bat Treat Cone
Welcome to the last stop on the Halloween Blog Hop hosted by Yolanda at http://craftyscentiments.blogspot.com/. You should have arrived at my blog from Amy at http://www.clearlystamping.blogspot.com/. If you didn't and want to start at the beginning of the hop, head to Yolanda's blog. Not only will you find lots of great Halloween projects created for you by 15 talented bloggers, but you'll find some blog candy along the way! So let's finish this hop off!
My project for the hop is a cute little bat cone!
I made this using 3D Party Cones and Paper Doll Dress Up. In CCR, I placed ovals from Craft Room Basics at the top of each section of the cone image from 3D Party Cones. When cut, this created the large curves across the top of the cone. I cut a bat image from PDDU and trimmed away the body, leaving just the wings. I attached the wings to the sides of the cone, punched a couple of holes and added the ribbon. A couple of googlie eyes and fangs from white cardstock scraps, and the bat was ready to fill with candy and hang on a door knob!
Thanks for hopping along with us and thanks for visiting my blog. Hope you enjoyed it and will visit again!
Happy Halloween!
Saturday, October 6, 2012
Witch Shoe with Cookies!
Welcome to the two day Falling for Halloween Blog Hop! Thanks for joining us to enjoy all the wonderful crafty inspiration for the Fall and Halloween season. You should have arrived here from Michele's blog. If you didn't and want to start at the beginning of the hop, go to Maria's blog and you won't miss any of the projects.
My project for today is an oldie but a goodie. And one that I get lots of requests for. So without further ado, here is a witch's shoe that I created in Design Studio using the princess shoe from the Princess Party cart and shapes from the George and Basic shapes cart. I simply welded some triangles to the toe portion of the shoe to make it pointy! I will be re-creating the file in Cricut Craft Room and sharing it soon.
I stacked green mint Oreos in a clear treat bag and tied it off with pretty purple ribbon and place them in the shoe. The flower is from the Flower Shope cart and the buckle is from George and Basic Shapes. I originally saw DoxieMel's creation and knew I had to make my own version. Thanks DoxieMel for the inspiration!
Thanks so much for joining in on the hop today. Please be sure to check out all the participant's wonderful projects. The next blog you will be visiting belongs to the very talented Cindy. If you should get lost along the way, go back to Maria's blog for the complete blog list.
Be sure to hop again tomorrow for a new project! Well, it's a Halloween version of one of my Mania projects! See you tomorrow!
Friday, October 5, 2012
Circle Mania Projects
I know I haven't posted anything in a while, but I have been busy crafting! This past weekend, I hosted a weekend long Cricut crafting party that I named Circle Mania. Most of the projects I've been making have been for Circle Mania and I wanted to keep them a surprise until Mania happened. So here are a few things I made:
A tag for the 50 Welcome bags {it's a clear plastic treat bag with a water bottle, Hershey bar and bag of pretzels} the attendees received when they checked in. The hotel was nice enough to keep them at the front desk and give them out! I also wrapped the water bottles in white and green polka dot cardstock.
Name tags for all the attendees with cardstock and silk flowers and a keepsake center:
Another water bottle wrapped with white and pink polka dot cardstock and a flavor packet holder:
A little Cricut box filled with candy:
Chocolate bug head lollipops:
And boxes to hold the door prize tickets:
More Mania projects and photos to come!
Sunday, July 15, 2012
Christmas Treat Cone!
All the Christmas in July events made me want to craft something Christmasy! So here is a little treat cone filled with M&Ms! I used the 3D Party Cones digital images and cut the cone from the plastic clamshell from a Cricut cart. I used the Swiss Dots embossing folder to emboss the cut image and then used Terrifically TackyTape to assemble the cone. I made the tag by printing the sentiment on my computer and cutting it with my Cricut using Mini Monograms along with the red and white layers.
I think I'll make more {I have tons of the plastic!} around Christmas time and put the M&Ms or maybe peppermints in a little bag and place that in the cone. So, what do you use the plastic clamshells from all your Cricut carts for?
Wednesday, July 4, 2012
Patriotic Treat Cones
Happy Fourth of July! For our celebration, I used the Cricut 3D Party Cones digital images to make these red, white and blue treat cones! It was so easy. All I had to do was decide what colors, cut and glue. And then, fill them with some yummy red and silver Hershey Kisses!
And here's some good news for you. . .Provo Craft is giving everyone with a Cricut Craft Room account access to this image set for the next week! So, you can make your own set of Patriotic Treat Cones or a set in any other theme that you want! All you have to do is log into your CCR account and the images are there. Don't wait. . .they aren't free forever! Give them a try. . .I'm sure you'll love using this image set!
Here's another set I made for Easter this past year using the 3D Party Cones and Animal Kingdom.
What type of treat cones do you think you'll make? Be sure to check out the challenge using this free file:
http://cricutcraftroomblog.blogspot.com/2012/07/time-for-challenge.html
Tuesday, June 12, 2012
Water Bottle Flavor Packet Tag
I made this little water bottle flavor packet tag for the weekly challenge on the Cricut Circle Blog. This week's challenge was to use a "sun" image and the word "summer" in your project. I designed the tag, the scallop around the hole for the bottle, the patterned paper inside the pocket and the sunglasses in CCR using Craft Room Basics. The sun is from Doodlecharms, the word "Hot" is from Birthday Bash and the words "summer days" are from Billionaire.
Even though I prefer to let my Cricut do all the cutting, the tag can be made by cutting a strip of cardstock 2 1/4 inches wide and 7 3/4 inches long. Score each end at 2 inches. Cut a scallop {or other shape} and glue it onto one end of the strip. Use a 1 1/2 inch punch to punch a hole through the center of the scallop. Glue a rectangle of patterned paper to the center section. Fold up the bottom on the score line and glue only along the edges. Decorate the front to fit your occasion, insert a flavor packet and hang from a bottle of water!
Sunday, April 29, 2012
Blog~iversary Celebration!
Just last April, I started posting on my blog. Who knew it would be so much fun? OK, I have to admit that my friend, Narelle, kept telling me to start a blog and she even did most of the work to get mine started. I just had to make stuff!
So to celebrate the past year and to thank those that follow my blog, I'm having a Blog~iversary Celebration! I'll be giving one lucky follower their choice of any cart available through cricutrewards.com including the Circle Exclusive carts!
For your chance to win, follow my blog and comment on this post! Want a second chance to win? Pin one of my projects to your Pinterest board and come back and post the link! How about a third chance to win? Comment on one of my projects that are posted {mostly in the Other Crafts forum} on the Cricut MB and come back and post the link! If someone else already posted on a project thread within the past 24 hours, find another project to post on for it to count. And, don't post on the same project more than once.
And, to make it crazier. . .you can post everyday until May 5! Just make sure you only post one general comment on this post, one project pinned and one comment on the Cricut MB one one of my projects posted there in a 24 hour time frame. I will be looking at the dates based on Eastern Time, so adjust for your time zone so your entry isn't disqualified. That means you could post 3 times each day for the 7 days and have 21 chances to win!
Still not crazy enough? If I should hit 600 followers before the end of the celebration, I'll pick TWO winners!
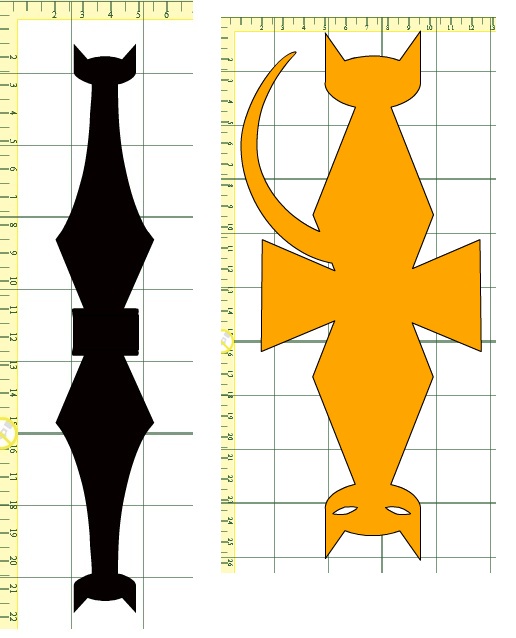
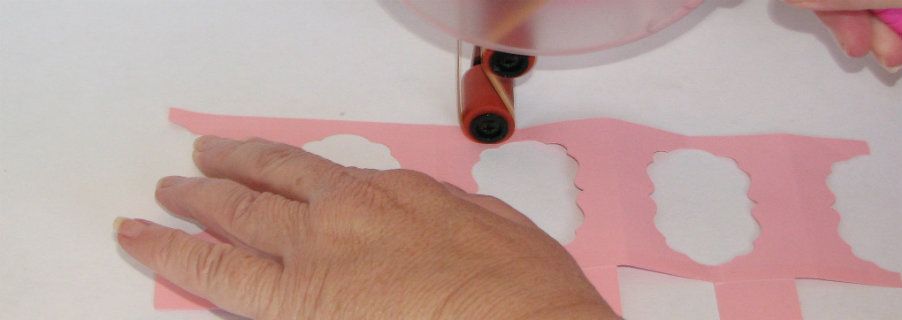
Thanks so much for all the support you have given me and good luck in the celebration! Let's get this party started!!! And, every party needs cake! So I designed this cute little cupcake stand in CCR using Craft Room Basics. Once you cut the two pieces,
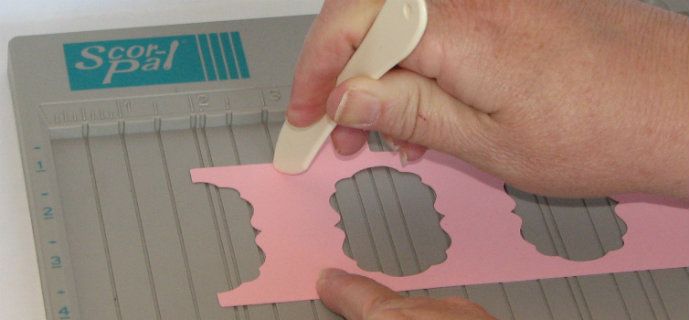
you simply score the base between the cutouts, then flip the base over and score down the middle of the cutouts and score along the top edge.
Then, accordian fold the base,
apply adhesive to the top and bottom edges and match of the folds.
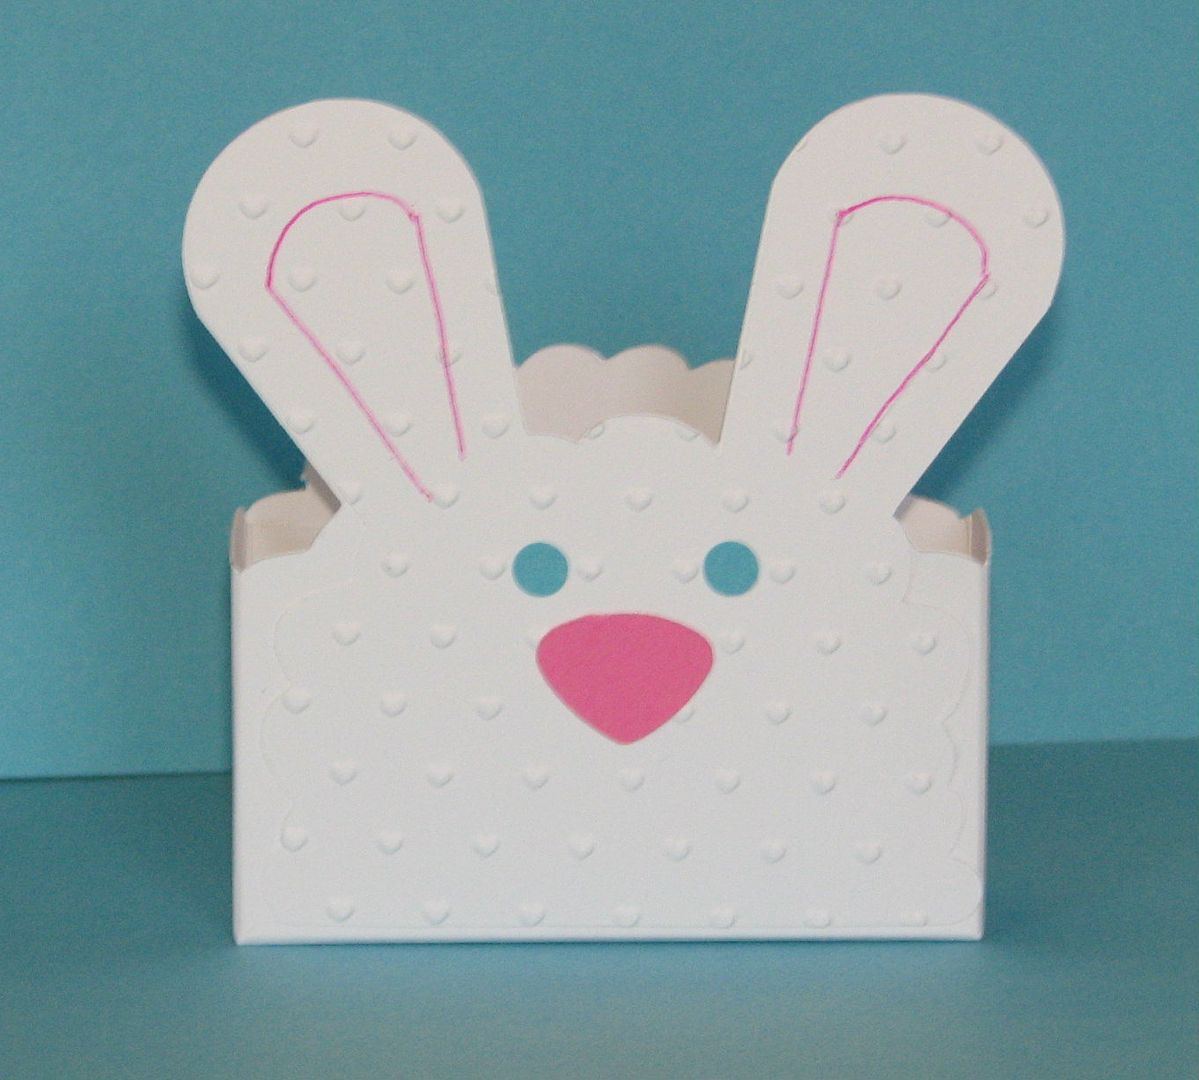
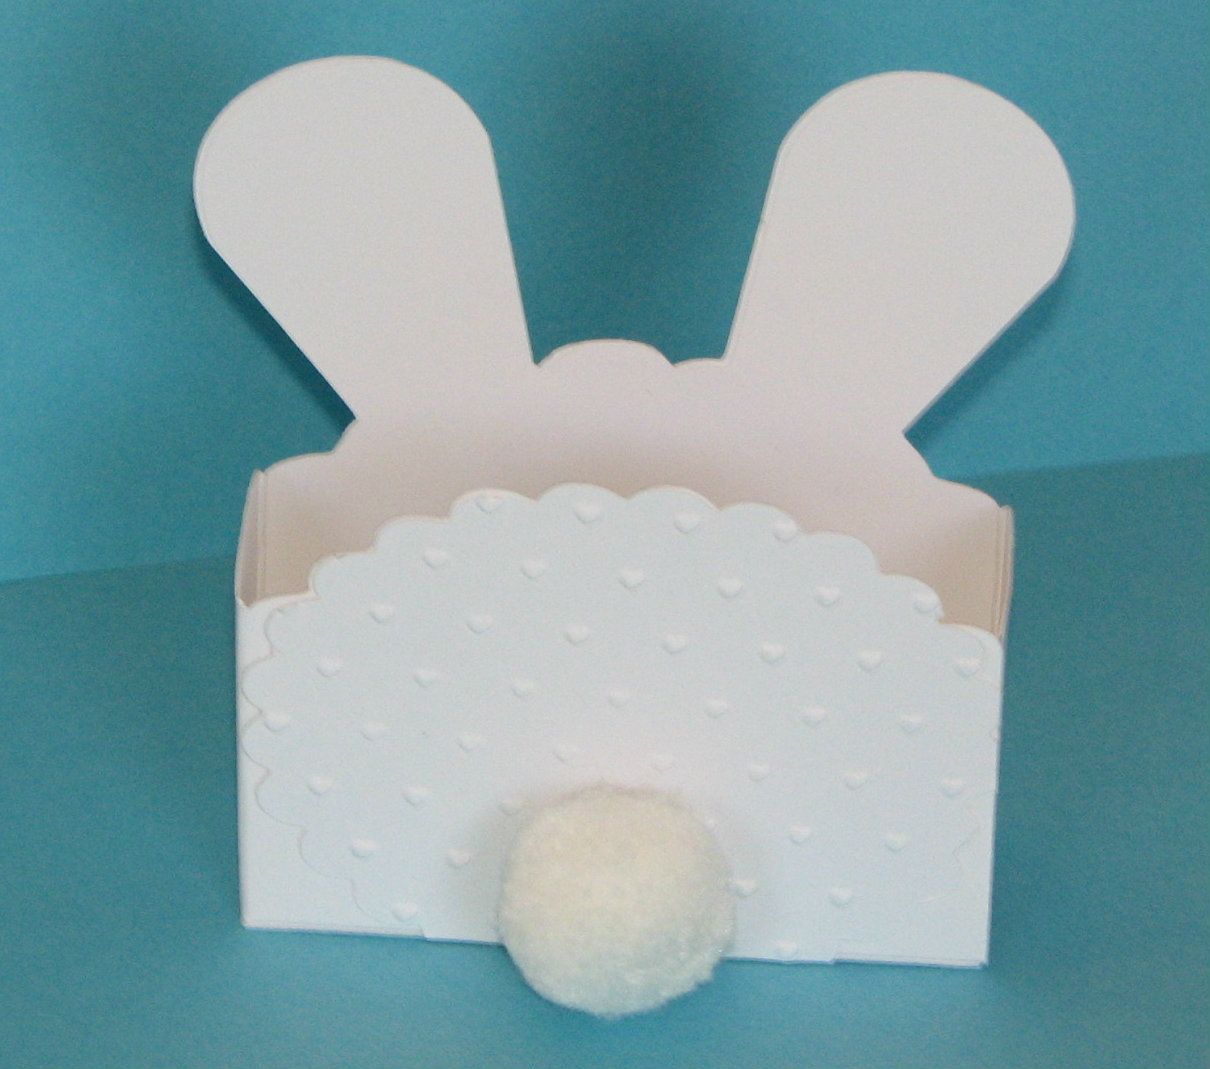
Fold the tabs down along the top and apply adhesive, turn it upside down and stick it to the scalloped circle.
Flip it over and place your cupcake {or Cricut Bug} on it's stand!
Cupcake stand file for CCR:
https://www.box.com/s/fa5f60d0549470d102a9
Cupcake stand file for Gypsy {which can also be opened in DS}:
https://www.box.com/s/eda37545fa781771ce45
Monday, April 2, 2012
Who Is Hiding In Your Easter Basket?
Here's a cute 3 dimensional card I made using Doodlecharms and Slumber Party. I cut several of the baskets and layered the grass, eggs and bunny on them with pop dots to get a 3D effect.
And here's a little treat box I made using the same bunny from Slumber Party and Plantin.
CCR file for the Bunny Treat Box http://www.box.com/s/ede12806751b93ddedec
And here's a little treat box I made using the same bunny from Slumber Party and Plantin.
Subscribe to:
Posts (Atom)