Monday, September 19, 2011
Halloween Bucket
It's that time of year when people are starting to think of Halloween. I've recently received a few questions about the Halloween Bucket I made a few years ago that is in the Project Gallery. The images on the sticks are from Paper Doll Dress Up. I cut two of each image and glued them together around the edges of the side and top. Then, I painted tiny dowels orange, cut them to size and slide the image on. The bucket is a plastic witches cauldron filled with candy. The title, Happy Halloween, is a font that was cut with a Wishblade.
Saturday, September 10, 2011
Mom's Sewing Box
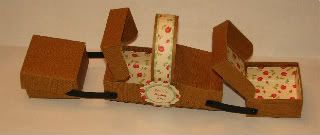
During her lifetime, my mom was an amazing seamstress. She made all sorts of clothes, mostly dresses, for my sisters and me. I remember her big wooden sewing box. It had so many little boxes and drawers. I decided to try to recreate it using paper. The design is basically four boxes that are attached with paper "hinges" and brads. I used Design Studio and the George and Basic Shapes cart to create the boxes. The beautiful pattern paper is by Cosmo Cricket and aptly named Remnant. I used Mini Monograms for the shapes to make the tag and used the Cuttlebug Language of Love embossing folder. My mom used her box to hold buttons and ribbons and lace and such that she would use to adorn her sewn creations. I'll use my little paper box to hold buttons and ribbons and flowers and such to embellish my little tags and cards. Thanks Mom! :)
Wednesday, September 7, 2011
And the Winner is. . .
JavaJen!!! You won the Christmas Cards Seasonal cart from the Fall Blog Hop! Congrats! Send me an email (scrapalette@gmail.com) with your address and I'll get the cart mailed out to you!
Thanks to everyone who hopped by during the blog hop! :)
Thursday, September 1, 2011
Heart Basket/Box
Welcome to the Anything Goes Blog Hop celebrating the one year Blog Birthiversary of our hostess, Stephanie, from Once upon a Paper. You can start at the beginning of the hop at
For the celebration, I have created a gift or favor box using hearts for the sides! Probably better suited for Valentine's Day but Anything Goes!!!
There are many versions of this bag but the one I used for designing was on Kirsten's blog. I changed the design so that I could cut everything with my Cricut. I used Design Studio and several carts: George and Basic Shapes, MS Elegant Cake Art and Baby Steps.
Thank you for stopping by! The next stop on the hop is Renee at http://icameisawicreated.blogspot.com/
Happy Blog Birthiversary Stephanie!!! :)
Monday, August 29, 2011
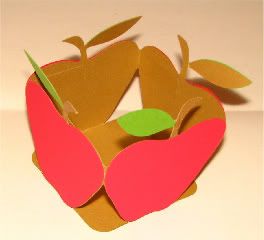
Apple Basket and a Challenge!
This is a cute little multi-purpose basket I designed using the new Cricut Craft Room software from Provo Craft.
The tutorial for the basket and the details on the Challenge are over on our CraftRoom blog. There is a prize for one lucky participate in the Challenge! Hope you'll check it out! http://cricutcraftroomblog.blogspot.com/2011/08/apple-basket-and-our-first-challenge.html
Saturday, August 27, 2011
Paper Cubes
If you just happened to visit my blog and want to start at the beginning of the hop, go to Kristen's blog http://fantabulouslypink.blogspot.com/
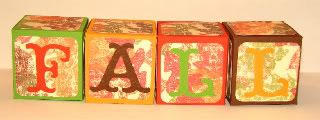
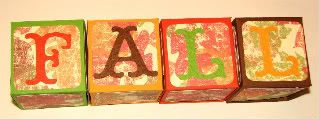
My project for the Fall Blog hop is a set of decorative, paper cubes that spell F*A*L*L.
They are super easy to make and can be changed to fit any theme or decor. I used Design Studio and George and Basic Shapes cart to create the cube. (Then, I was looking for a cut on the Tags, Bags, Boxes and More cart and saw a square box there that would probably work too.) File available at the end of this post.
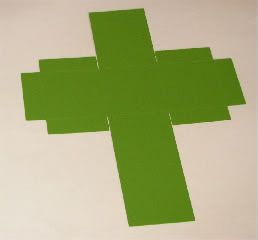
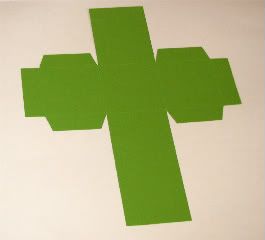
Once you cut the box, it will look like this:
Then I take scissors and clip the corners of the tabs that will go inside the box. I find it's easier to hand snip them than to make sure small triangles line up on those edges in Design Studio and then you have to peel those small pieces off the mat!
And, then your box looks like this:
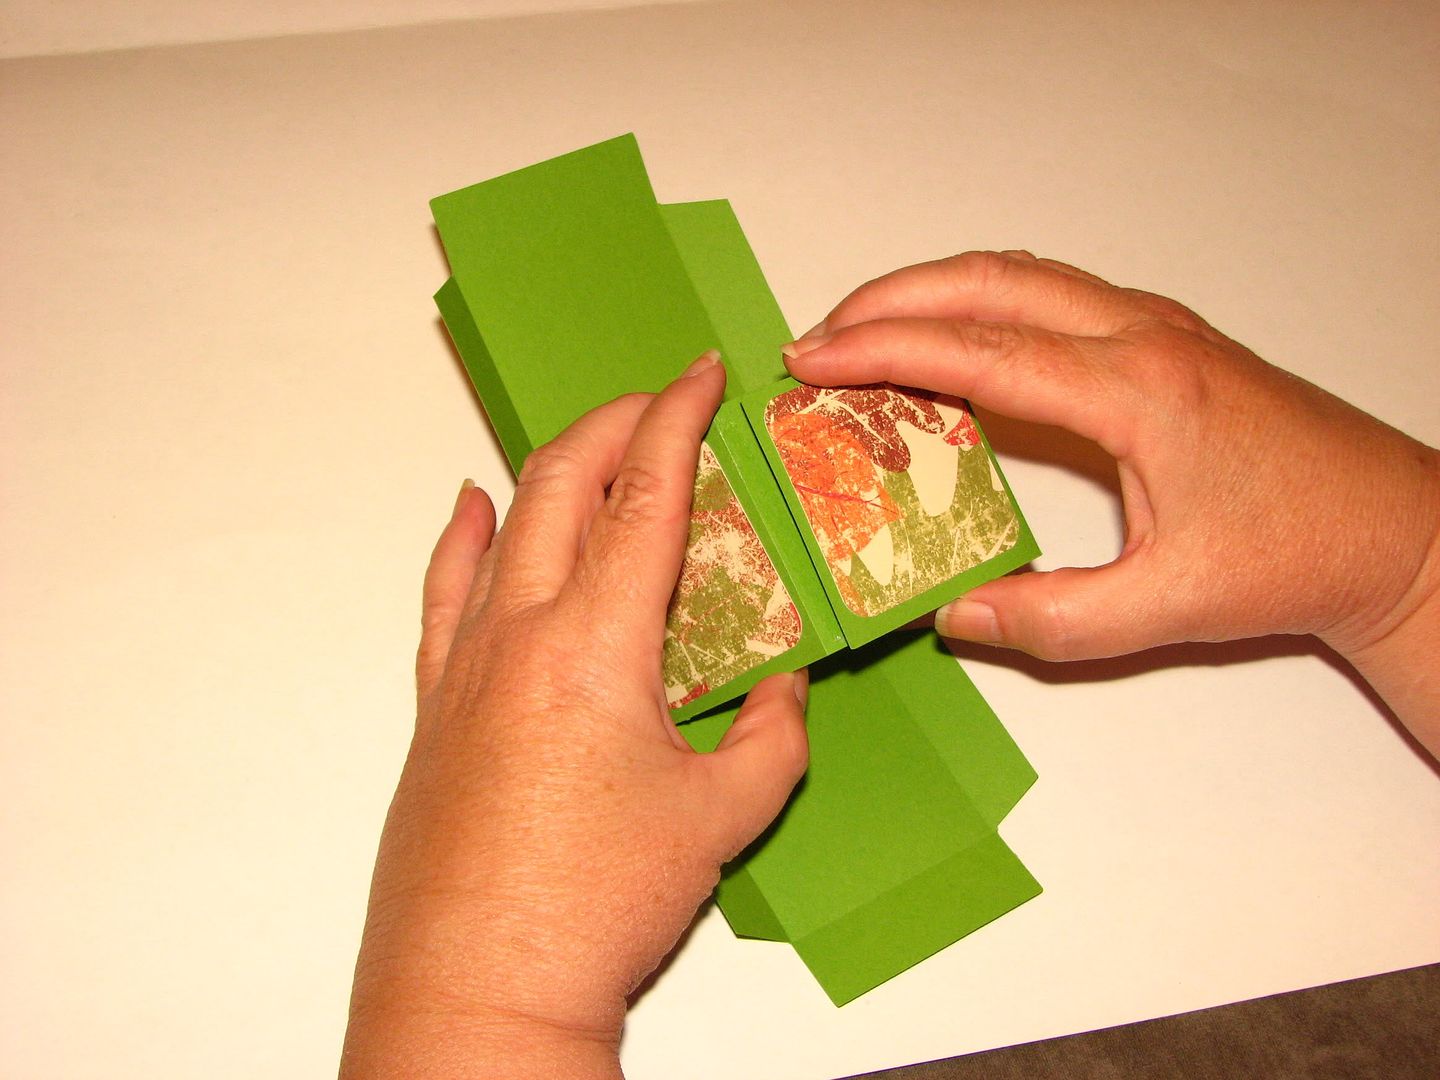
The file has scorelines, so fold those to make it easier to place the background paper. Apply adhesive to the side tab and join it to the opposite side of the box.
Close your box and decorate. If you are going to fill the box, glue the bottom so it will stay closed. Otherwise, leave it unglued and you can store your box flat until next use.
I think I will make a set that spells Merry Christmas. What will your cubes spell? Become a follower of my blog and leave a comment on this post for a chance to win the Christmas Cards Seasonal cart! I"ll randomly pick a winner on Wed, September 7.
Your next stop on the Fall Blog Hop is Paper Memories http://papermemories4u.blogspot.com/ . Thanks for hopping by!
My project for the Fall Blog hop is a set of decorative, paper cubes that spell F*A*L*L.
They are super easy to make and can be changed to fit any theme or decor. I used Design Studio and George and Basic Shapes cart to create the cube. (Then, I was looking for a cut on the Tags, Bags, Boxes and More cart and saw a square box there that would probably work too.) File available at the end of this post.
Once you cut the box, it will look like this:
Then I take scissors and clip the corners of the tabs that will go inside the box. I find it's easier to hand snip them than to make sure small triangles line up on those edges in Design Studio and then you have to peel those small pieces off the mat!
And, then your box looks like this:
The file has scorelines, so fold those to make it easier to place the background paper. Apply adhesive to the side tab and join it to the opposite side of the box.
Close your box and decorate. If you are going to fill the box, glue the bottom so it will stay closed. Otherwise, leave it unglued and you can store your box flat until next use.
I think I will make a set that spells Merry Christmas. What will your cubes spell? Become a follower of my blog and leave a comment on this post for a chance to win the Christmas Cards Seasonal cart! I"ll randomly pick a winner on Wed, September 7.
Your next stop on the Fall Blog Hop is Paper Memories http://papermemories4u.blogspot.com/ . Thanks for hopping by!
Friday, August 26, 2011
Teeny Tiny Rose Tutorial
Since the team over at Fantabulous Cricut http://fantabulouscricut.blogspot.com/2011/08/thursdays-tutorial-birthday-projects.html choose to feature my tea light cake and teeny tiny roses, I thought I should do a tutorial!
You can use any scallop circle and size it according to your project. I used Elegant Edges and 1.25 inch circles for the roses I made for the tea light cake. If your image doesn't have a center circle cut out, use Design Studio, a Gypsy, CricutCraftRoom or a punch to add one.
Then snip between two of the scallops (anywhere is fine).
Take your quilling tool and insert the end to the left of where you cut the scallops.
Begin rolling the quilling tool toward you, keeping the paper tight around it.
When you reach the end of the strip, pull the rose off and let it "relax" a bit. Then glue the end to the roll.
Let the glue dry and use your fingernails to bend back some of the scallops.
And, there you have it. . .a cute teeny tiny rose for your project!
Subscribe to:
Posts (Atom)