Showing posts with label baby. Show all posts

Wednesday, September 18, 2013

A Mini-mini Album

I used Craft Room Basics to create this little mini album for a friend who just had her first grandson! I embellished it with images from the Charmed, Tiny Treasures and Pooh Font carts.


It's designed to hold a lot of photos in a small space to make it easy for Grandma to carry with her. It's similar to a bigger mini album I saw years ago on a craft show hosted by Sandi Genovese. When you open it, it unfolds not just once. . .


But twice!


And then each section has a flap that opens to reveal a pocket holding a double sided photo/journaling mat.


So there are 9 spots for photos/journaling in this little 3 x 3 inch {it's actually a smidge bigger} album!

And it all fits in the palm of your hand!


I sure hope she likes it!  Congratulations Carolyn on becoming a Grandma! :)

Wednesday, August 21, 2013

Is it a bag. . .or a box?

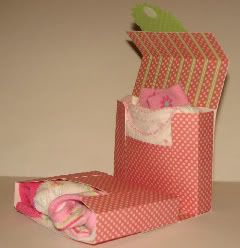
No matter what you call it, it's once cute little project! The original design was from an origami book {which has been all over Pinterest lately} and the bag/box itself required no cutting and used an 8.5 x 11 inch paper. But I designed it in CCR using shapes from Craft Room Basics so I could make it any size I wanted. The words "Heaven Sent" are from the 9 Months cart and the adorable little bear is from the new Circle exclusive cart, Charmed!

This is what it looks like on the inside. I plan to fold and roll 3 little newborn onesies to put in the bag.

And this is how it looks from the side. I used a velcro dot to hold the bag/box closed.

I think I'll be making a smaller one to use as a shower favor! So what do you think. . .is it a bag or a box?

Monday, June 25, 2012

Carousel for Baby

Here is a little tea light holder I made using scallop circles from CCR and the rocking horse from Paper Doll Dress Up. The top comes off and there is a battery operated tea light inside!


A nice little glow!


Tuesday, August 9, 2011

Diaper Tricycle!


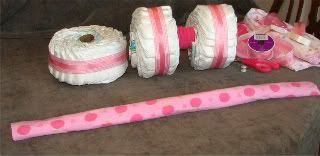
I'm sure you've seen the Diaper Cakes that everyone is making for baby showers and gifts. And while I love the diaper cakes, I wanted something a little different for a special friend who is expecting a baby girl. So, here is the Diaper Tricycle I made for her!


To make the Trike, I used a package of 50 diapers, two receiving blankets, two bibs, a pair of baby socks, a bottle, a baby washcloth, two diaper pins and some ribbon. Other items used were a toilet paper tube, a paper towel tube, rubber bands and some glue dots.


Start by dividing the diapers. I used 15 for each of the back tires and 20 for the front. Take the toilet paper tube and layer the diapers around it. Secure them with a rubber band.


Take the paper towel tube and repeat the process on one end. Wrap the washcloth around the tube and secure with a couple of rubber bands. Cover the rubber band holding the diapers together with ribbon and glue dots.


Wrap the other end with the remaining diapers. And cover the rubber band with ribbon.


Take one of the receiving blankets and roll lengthwise.

Thread the blanket through the paper towel tube and then through the toilet paper tube. Secure with the diaper pins.

Work the blanket back through the paper towel tube so the pins are hidden inside the tube. Roll the other receiving blanket lengthwise and thread it through the toilet paper tube. Place the bottle on top of the front diaper tire and bring the ends of the blanket straight up. Hold the blanket together by using a rubber band right above the bottle.


Add a bib to form the seat and the other bib to form the front fender. Bend the blanket ends down and back a little to resemble handlebars. Add a baby socks to each end of the blanket for the handlebar grips.


Add a bow around the rubber band on the handlebars and viola! You have a Diaper Tricycle!  So, what do you think?

Linking this post to:
http://www.tipjunkie.com/homemade-projects-88/
http://todayscreativeblog.net/
http://www.skiptomylou.org/?s=link&x=23&y=19
http://singingthreelittlebirds.blogspot.com/

Thursday, August 4, 2011

Baby Girl Dress Mini Album

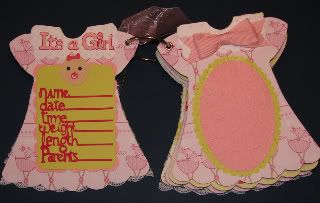
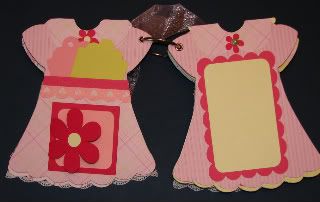
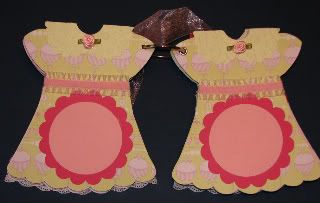
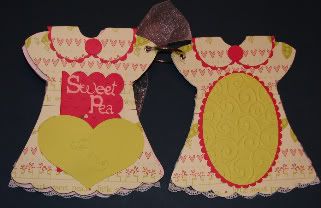
I originally made this album over a year ago and it's still the project I get the most questions about! So I decided to give it it's own post instead of just a picture in the Project Gallery. I used shapes from Paper Doll Dress Up and Everyday Paper Dolls to make the dress shape I wanted. I cut several out of white cardstock and using Scotch Quick Dry Glue and flat lace, I covered the top of one dress. I then used ruffled lace to make the skirt portion of the dress. I glued another dress to the back and repeated the process for the back cover. The rest of the pages were covered with scrapbook papers. The pages were decorated with cuts from New Arrival, Wild Card, Mini Monograms and George.

Saturday, July 16, 2011

Double Box


Welcome to the It’s a Wrap Blog Hop hosted by Cool Beans By L.B. Do you like to receive gifts?
How about give them? Well this hop is all about the outside…the wrapping; Gift bags, boxes,
baskets and more. There are 22 wonderful stops on this hop and we hope you will take some
time to stop in and see everything we have created for you.

You should have arrived here from, TX Scrapper Mom http://www.txscrappermom.blogspot.com/. If you are just finding our hop in the middle you can go to the beginning at Cool Beans By L.B http://coolbeansbylb.blogspot.com/.

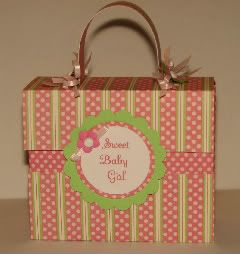
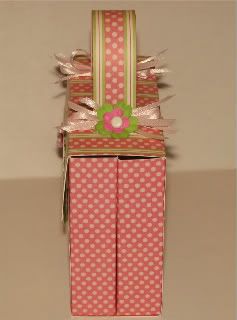
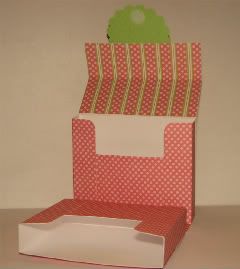
For my project, I created a double box! The box was created in Design Studio using the George and Basic Shapes cart. I cut two boxes using papers from DCWV Nana's Nursery stack. Once the boxes were made, I used coordinating paper from the same stack and made a cover and handle for the boxes. I printed the sentiment and cut it and the scallop circle using the Mini Monograms cart. It stays closed with a velcro closure under the scallop circle. A few ribbons and prima flowers and my box was ready to fill!

And, I filled it to the brim! There are 2 washcloths, a bib, a pair of socks and a onesie. . .all in pretty pinks and perfect for a baby girl gift!


But, using other papers, you could fill the boxes with baby boy items or school supplies or handmade cards or candy!

Speaking of candy, I am offering some fun blog candy on this hop…the Christmas Village solutions cartridge so you can start planning for those holiday gifts and decorations! For a chance to win just become a follower of my blog and leave a comment on this post. On July 20, I'll use random.org to pick a winner!

Thanks for stopping by on this fun hop. Your next stop is…Suzelle from www.craftsandmorebysuzelle.blogspot.com

Linking to:
http://craftspotbykimberly.blogspot.com/2011/08/monday-challenge-21-gift-bags-and-boxes.html