Tuesday, October 28, 2014
How to Size Your Envelope to Fit Your Card in Design Space!
In my Cricut Lovers Guide to Design Space group, we've gotten several questions about sizing envelopes to fit cards. Of course, the easiest way is to load your card and envelope onto the Design Space canvas and resize them both at the same time. But if you've made a card and now want an envelope to for it, here's a little tutorial on how to make the envelope fit your card. You just need to know the size of your card and find an envelope in your images in Design Space! {click on the photo to enlarge it so you can read it!}

Monday, October 27, 2014
Swirly Snowman from Kraftgineer Studios!
As soon as I saw this Swirly Snowman, designed by Kraftgineer Studios, I knew I had to have him! I had picked up a little red cutting board from the Dollar Tree and thought he would be great to decorate it. The svg file cut beautifully with my Cricut Explore. Weeding was a little tedious on the hat but the rest of the image weeded easily. And the results were beautiful!

I added a few snowflakes from one of my Cricut carts. Since this is for decorative purposes, I think I might add a little bling to the center of some of the snowflakes and top it off with a big bow on the handle!
If you'd like the design for yourself, look for Kraftgineer Studios on facebook!
I added a few snowflakes from one of my Cricut carts. Since this is for decorative purposes, I think I might add a little bling to the center of some of the snowflakes and top it off with a big bow on the handle!
If you'd like the design for yourself, look for Kraftgineer Studios on facebook!
Wednesday, October 15, 2014
Christmas Thank You Cards
A teacher friend wanted some Thank You cards for her students who will be giving her gifts for the holidays. She likes to write the notes and send them home with the students. The Present Card from the Anna Griffin Christmas Kitsch cart was perfect! I sized the cards to be 3 x 3 inches in Design Space and they cut beautifully. All of the little tiny circles were perfectly round. I did use the Hide Contour feature in Design Space to hide the circles and for those cards, I used the liner on the outside! Here are a few and I'll be making more of them before the holidays arrive!


Wednesday, September 24, 2014
Cricut Explore Print then Cut ~ Released!
Last night, the long awaited much anticipated Print then Cut feature in Design Space for the Cricut Explore was released! And to help you learn to use it, here are some very good videos from Cricut!
Print then Cut Basics
Print then Cut Advanced
Print then Cut Basics
Print then Cut Advanced
Friday, September 19, 2014
Using Imagine Carts in Cricut Design Space

There have been so many questions and differing answers on using the Imagine carts in Design Space. So I made this handy dandy flow chart based on the information I verified with Provo Craft. Hope this helps clear up the confusion!
Wednesday, September 17, 2014
Card Matching Game with Print then Cut

Surprise! I made a project for a little boy! Usually my projects are geared toward girls. This project could easily be changed to a girl project or a unisex project just by changing the images and paper used.
There are 18 cards and two of each picture so you can use them as a matching game or a memory game. The images are from Boys Will Be Boys. I used a rounded corner square from Craft Room Basics, sized it to 2.5 x 2.5 inches and set the color to white. I then sized the cars and trucks and rocket and helicopter to fit inside the square. I selected the squares and images {6 of them at a time} and Flatten them. I pressed GO, then Print and Continue and printed the page on my home printer. I then loaded that page onto my mat and into my Explore and it cut the cards. I used a patterned cardstock with white on the back side. That is the side I printed the cards on. Easy peasy!
Of course, I wanted a box for the cards. And I wanted to personalize it. And I wanted it to coordinate with the cards. They say you need to print on white paper only but back when I had a different cutter that had the Print and Cut option, I learned a little trick. Use white stickers where the registration marks will print! Hoping it would work with the Explore, I dug out some stickers.
I used these Avery 1 inch x 3 inch stickers and cut them in half and placed them on my pattern paper before loading it into my printer. On the Preview Mat, you will see where the registration marks will print for your image. I set up my design using the crayon box from Tags, Bags, Boxes and More and the marker font from the Pooh and Friends cart. I set the box color to light blue and the font to red. I loaded the paper in the printer and. . .

Voilà! My paper printed with the image and registration marks.

And it cut!

But, I decided I didn't like the red font, nor did I like the additional layer of blue. I was going for a slight difference and it was too dark for my taste. So I changed the box color to white, place stickers on another piece of patterned paper and Printed and Cut again. You can see the difference below.
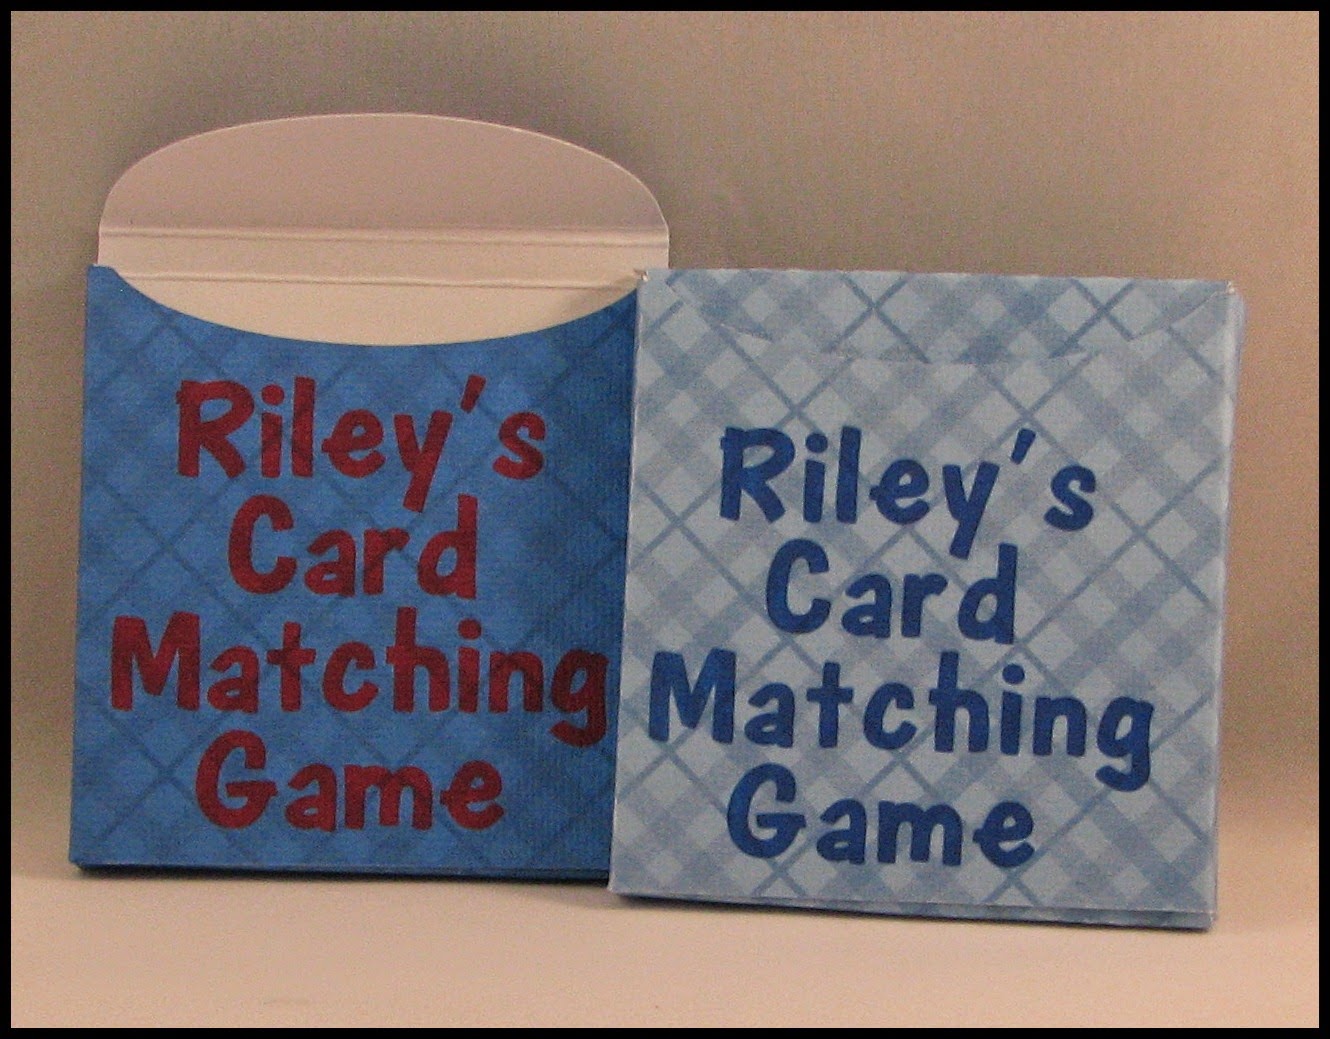
I'm pleased with the second box {even though the text is slightly off center and that's because I only "eyeballed" the placement. I hope there is a center or align feature in future updates.}.

Monday, September 15, 2014
Free Access to the Imagine Art Cart Library for Imagine Owners!
If you own an Imagine and have it registered in your cricut.com account, you should be receiving this email!
To whom it may concern,
You are receiving this email because we have record that you are a Cricut Imagine owner. Very soon, we will be releasing the Print then Cut feature for Cricut Design Space™, the online software used exclusively with Cricut Explore® machines. Even if you're not yet a Cricut Explore owner, you'll want to read on for exciting news.
As a Cricut Imagine owner, with the launch of the Print then Cut feature, your Cricut.com account will be granted free digital access to all Cricut Imagine Art Cartridges (even those you haven't purchased!) in Cricut Design Space for use with the Cricut Explore machine, whether you have one now or purchase one in the future.
Because you are receiving this email, no further action is required—the images will be loaded to your account. We want to make sure everyone who is eligible for this offer receives it, so we need your help in spreading the word to anyone who owns a Cricut Imagine but did not receive this email. If you know someone who has a Cricut Imagine, please ask them if they heard the great news. If they didn't receive this email, they can still get free digital access—they just need to contact customer service at imagineowners@cricut.com with the serial number of their Cricut Imagine machine and the email they use to log into Cricut.com. Customer service will then update their Cricut.com accounts to give them full access to all the Cricut Imagine Art Cartridges. Whether or not they own a Cricut Explore machine, they'll need to claim this offer by December 31, 2014, so that the images will be linked to their account if and when they upgrade their machine.
You will also be granted access to Cricut Imagine Colors & Patterns cartridges in a future release of Print then Cut. Once again, we thank you for being a loyal Cricut customer.
Happy crafting,
The Cricut Support Team
877-7CRICUT
support@cricut.com
877-7CRICUT
support@cricut.com
Subscribe to:
Posts (Atom)